Annotation
The following tutorial explains how to annotate your data in BikePed Portal, using our annotation tool.
Accessing the Annotation Tool
Suppose your organization is the Portland Bureau of Transportation, and you want to make an annotation regarding a sensor on the Tilikum Crossing Bridge:
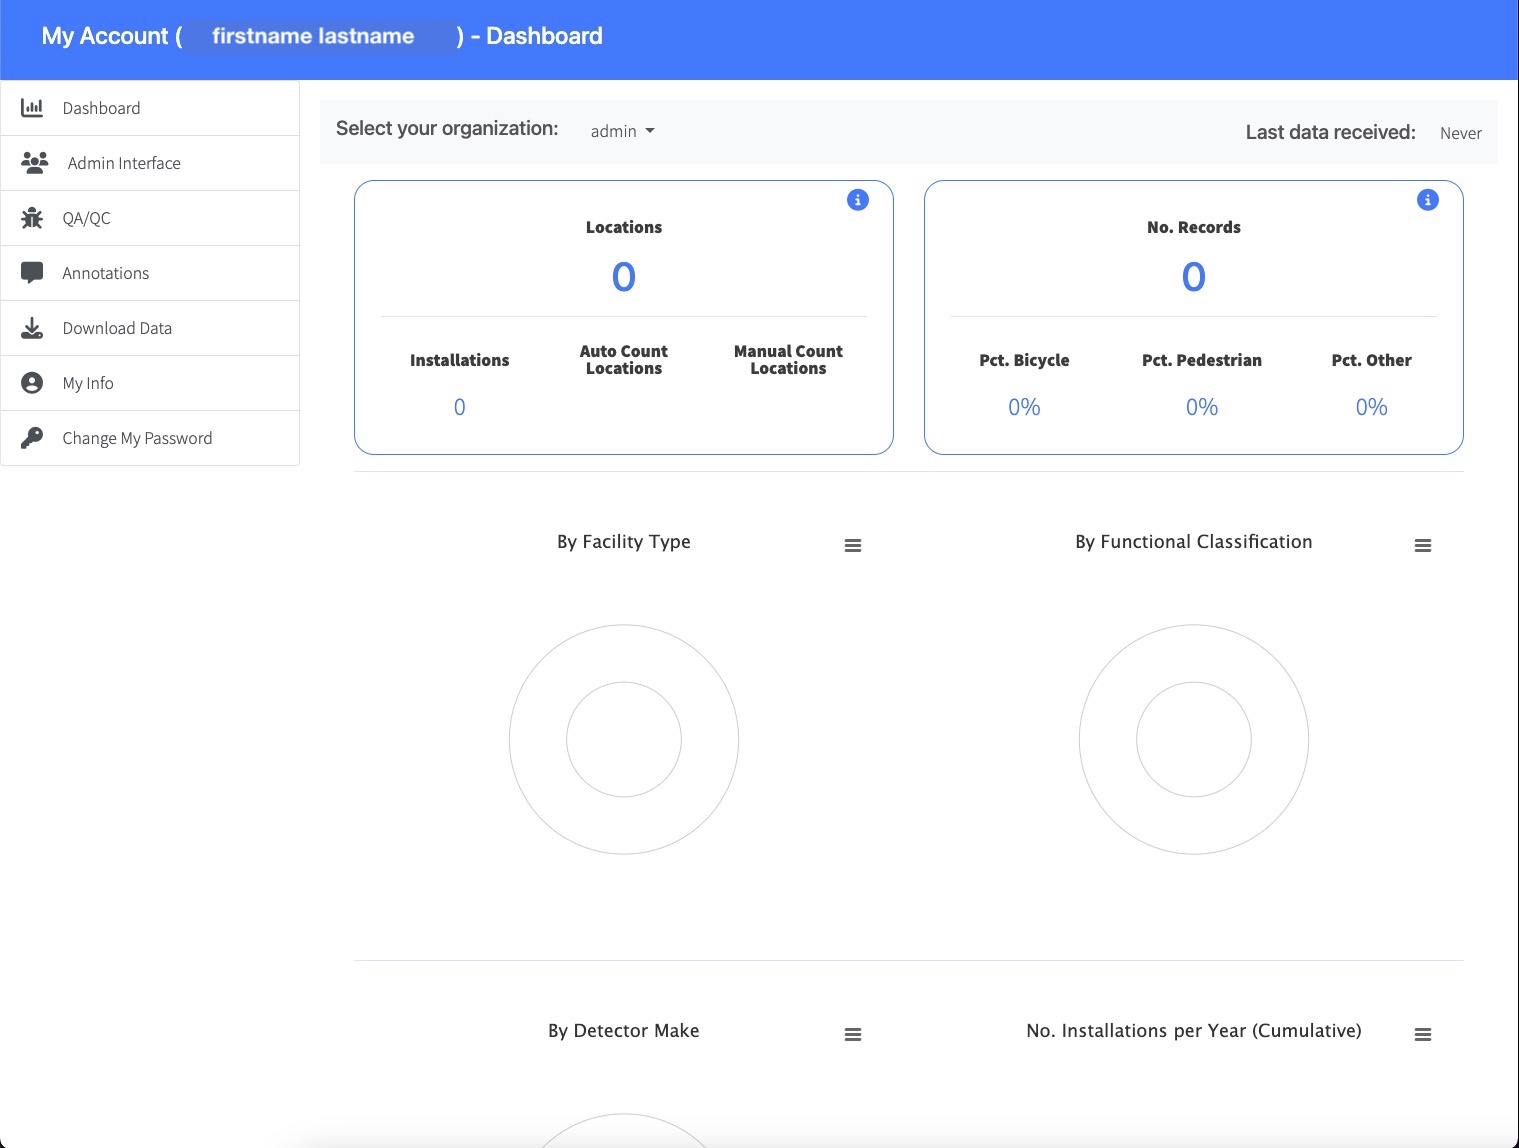
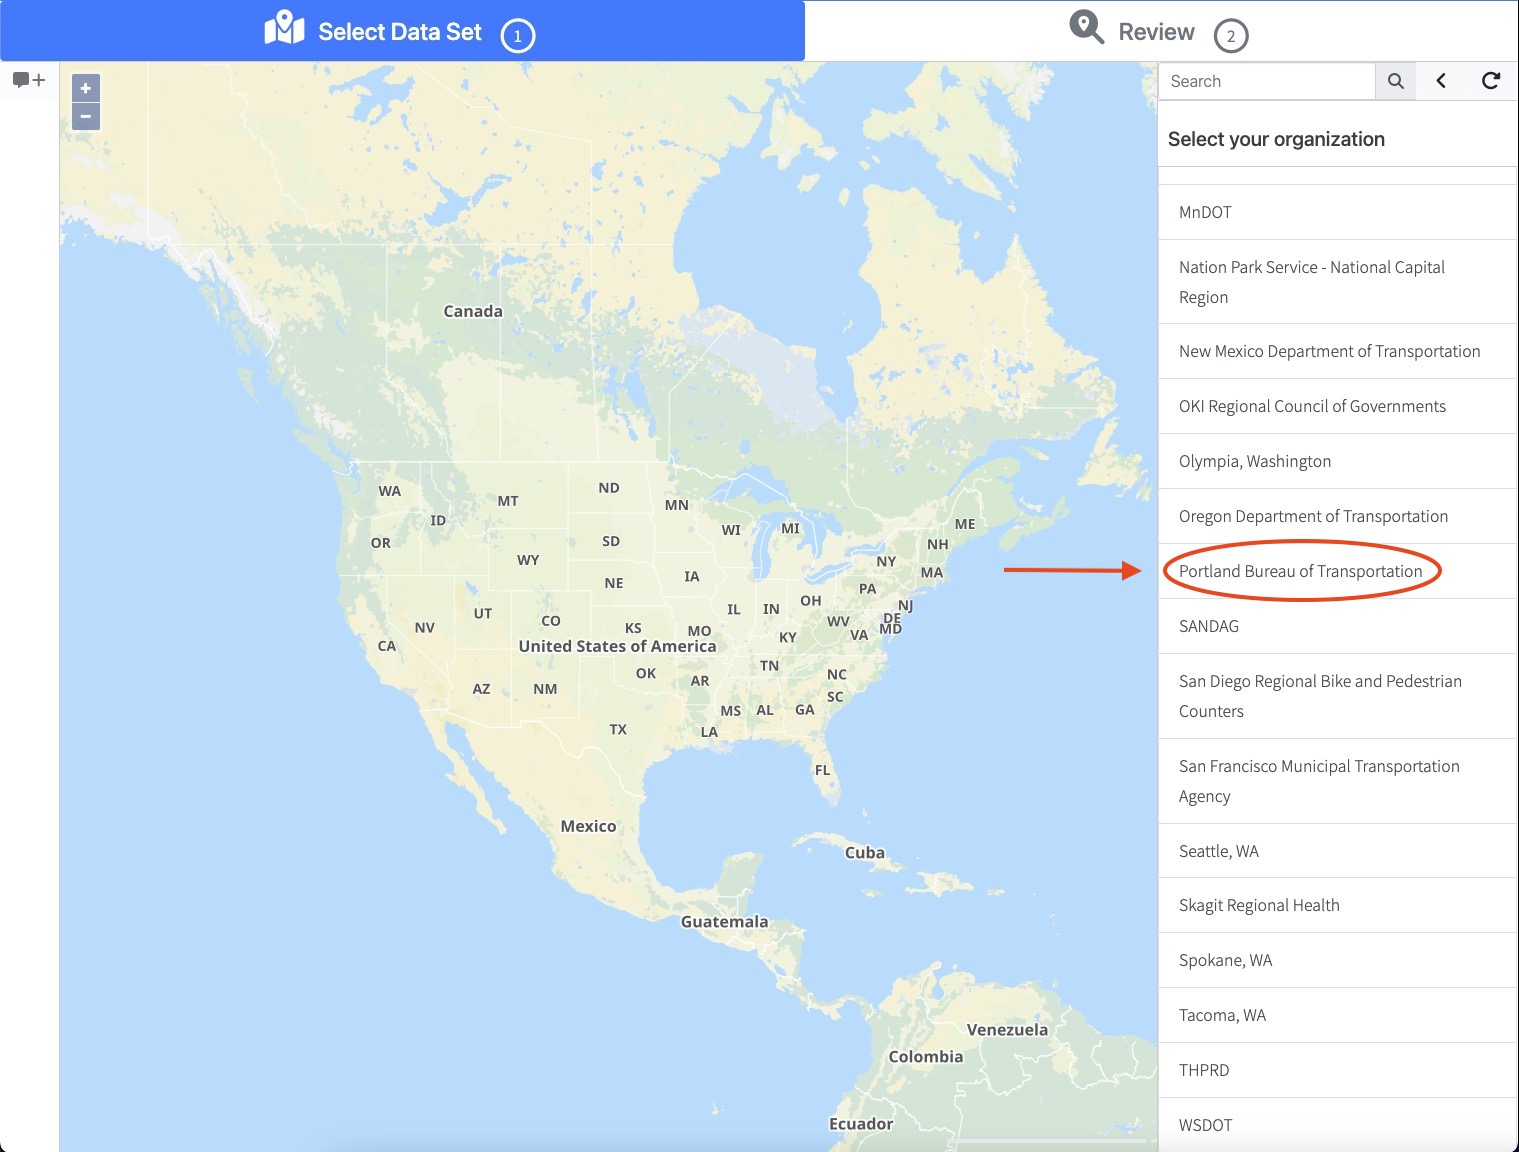
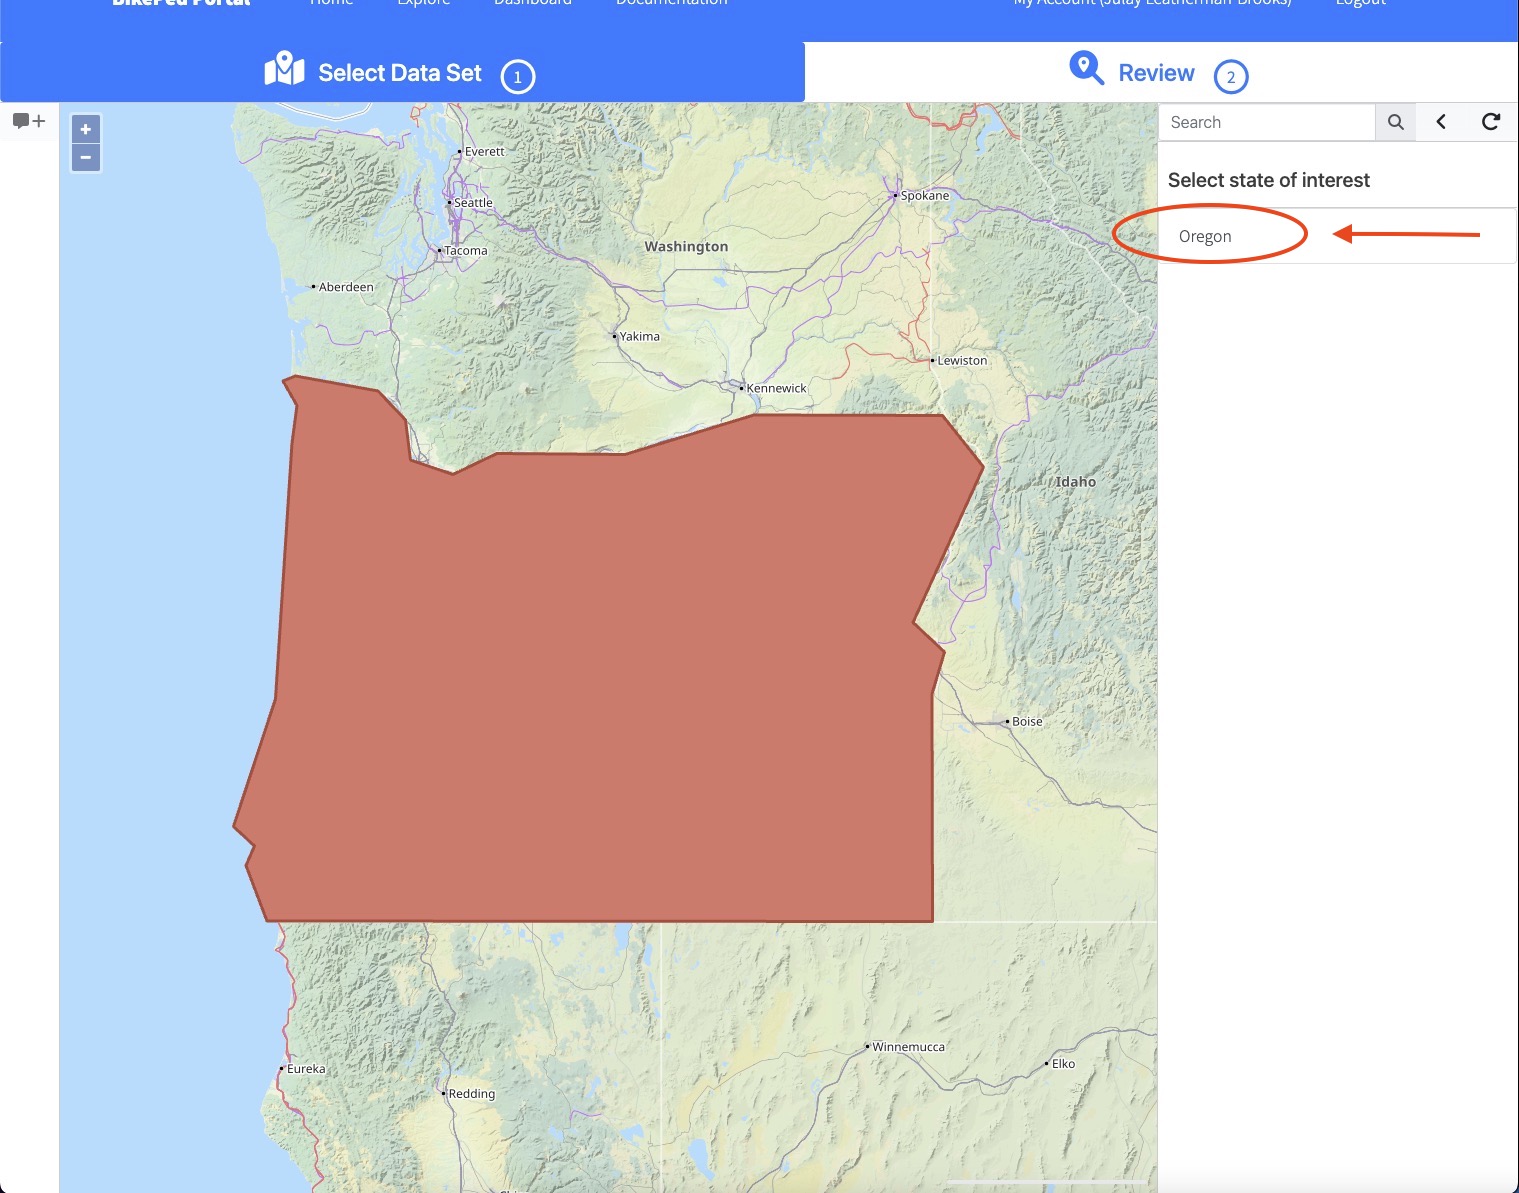
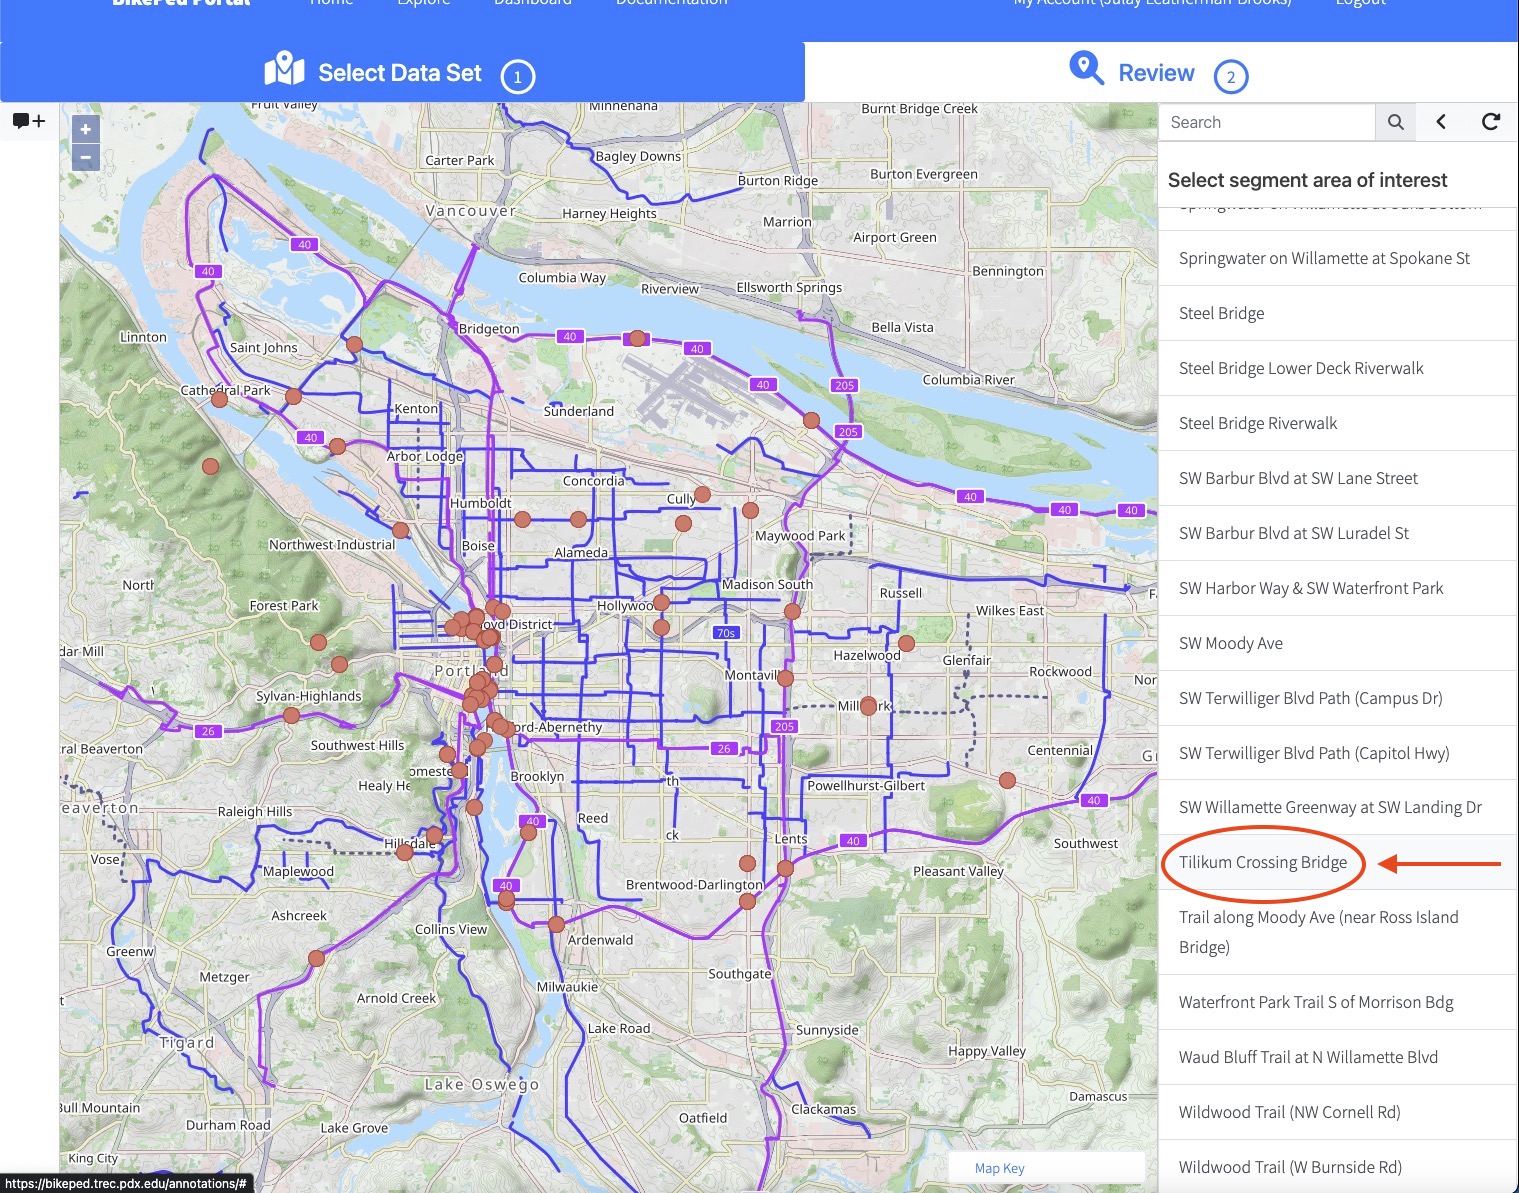
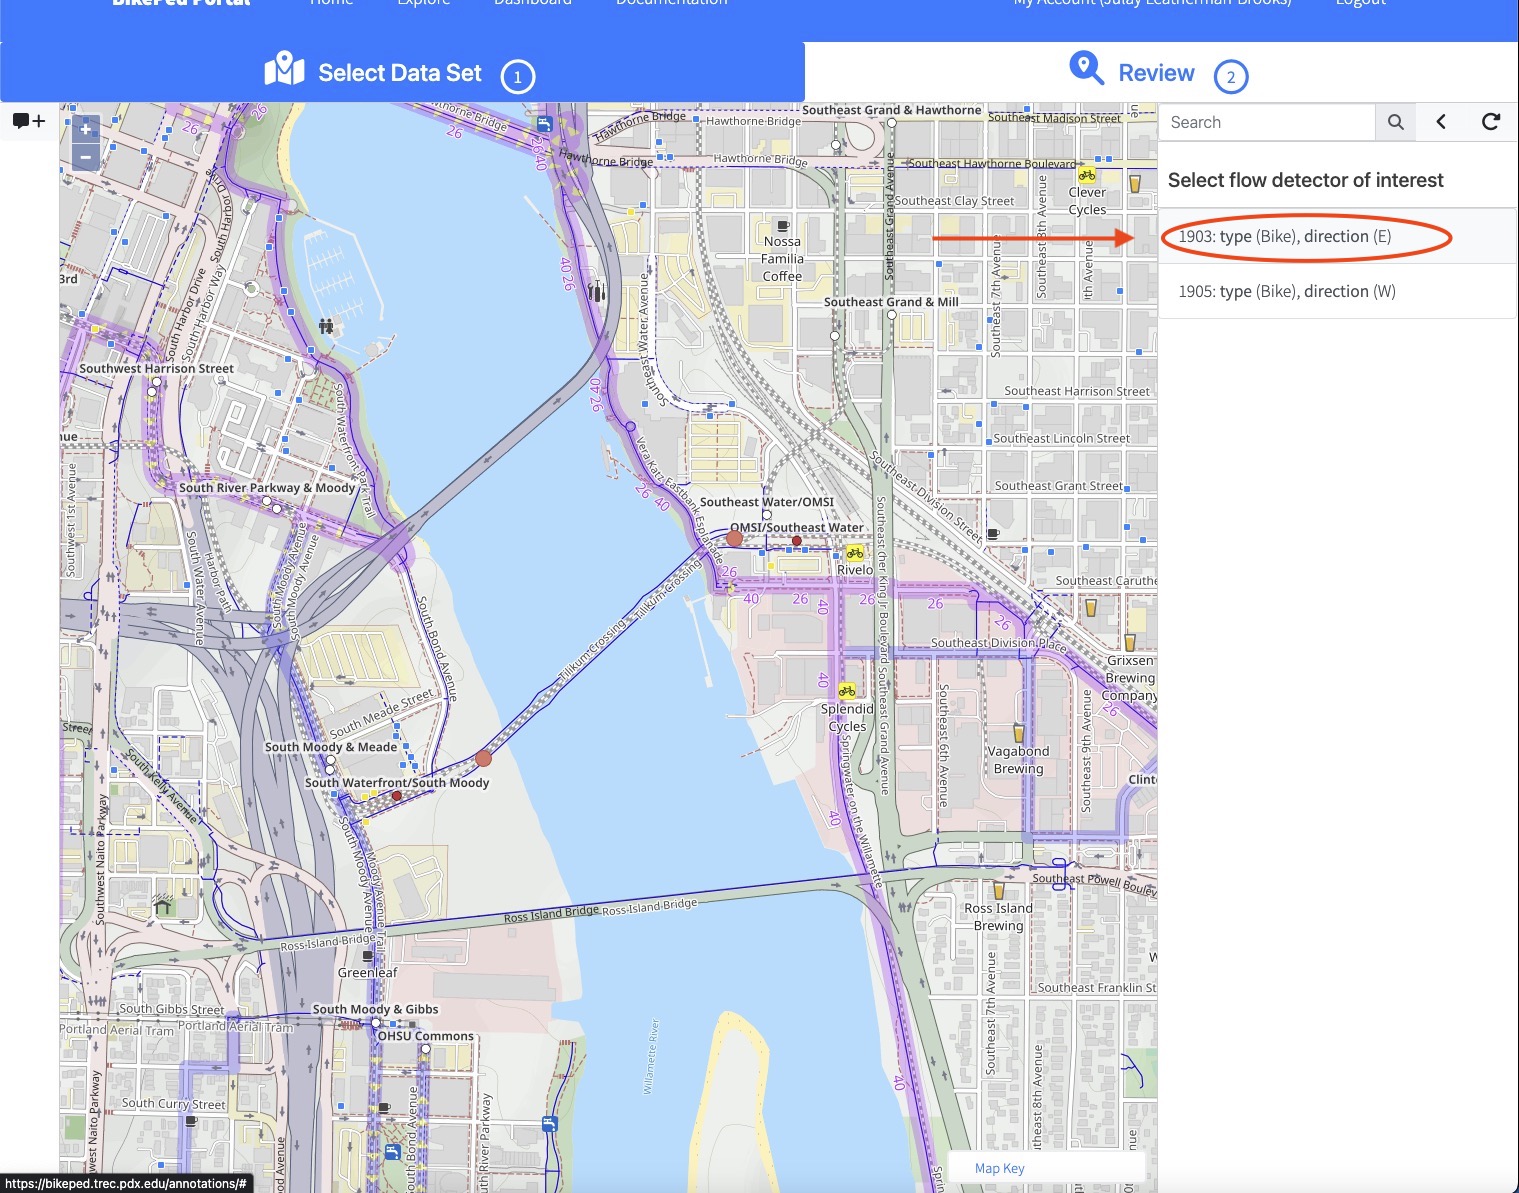
This last selection will bring you to Review Mode.
Review Mode
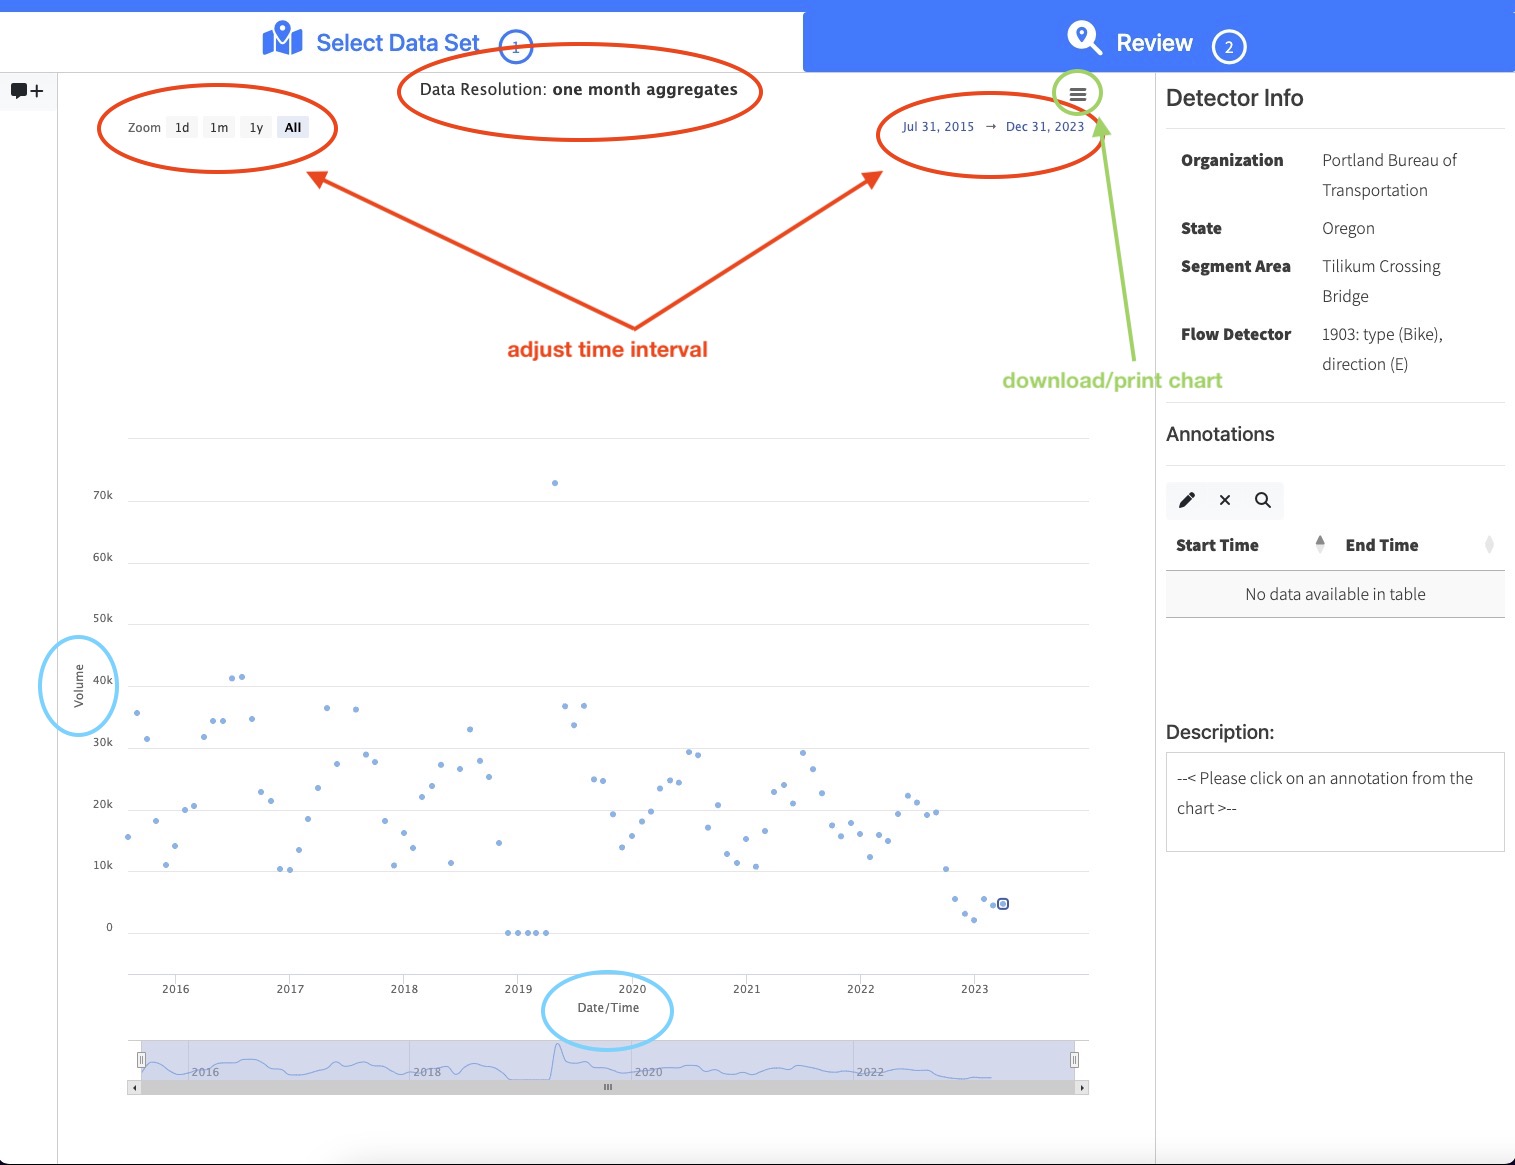
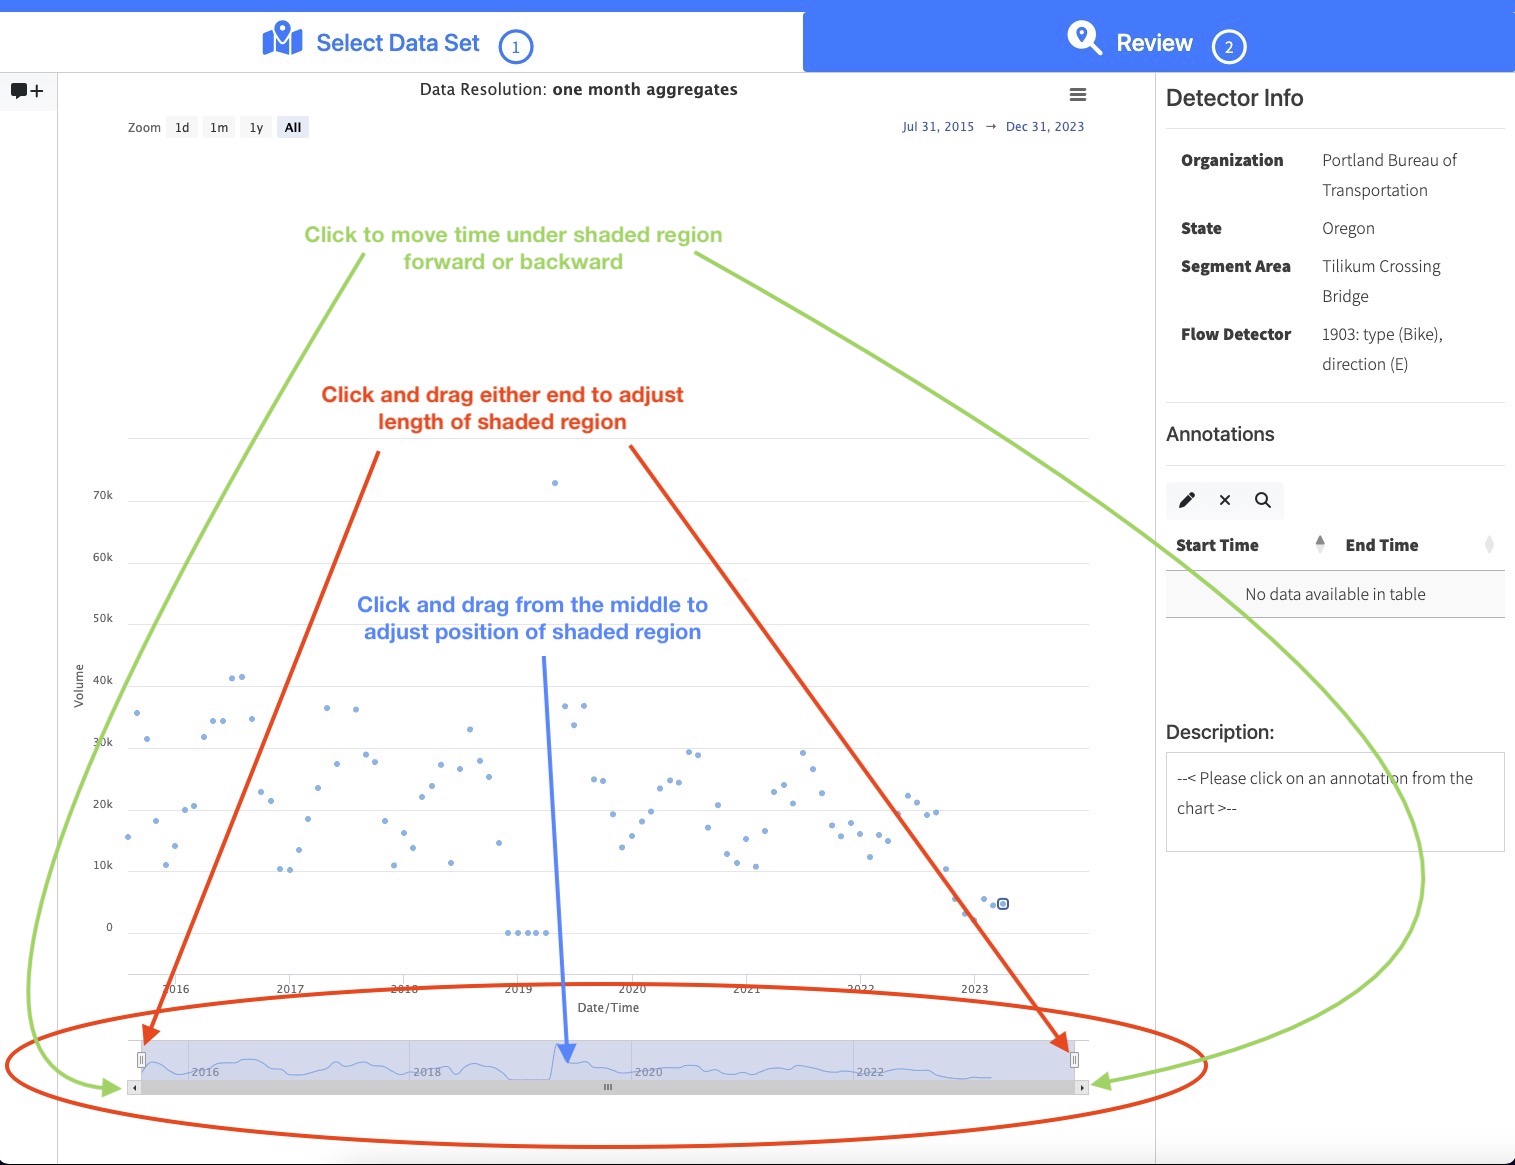
When you adjust the time interval, data resolution will also be adjusted, as follows:
- 1 day or 1 month time interval –> raw data (15 minute aggregates)
- 1 year –> 1-day aggregates
- All –> 1-month aggregates
Adding an Annotation
To make a new annotation, click on the annotation icon:
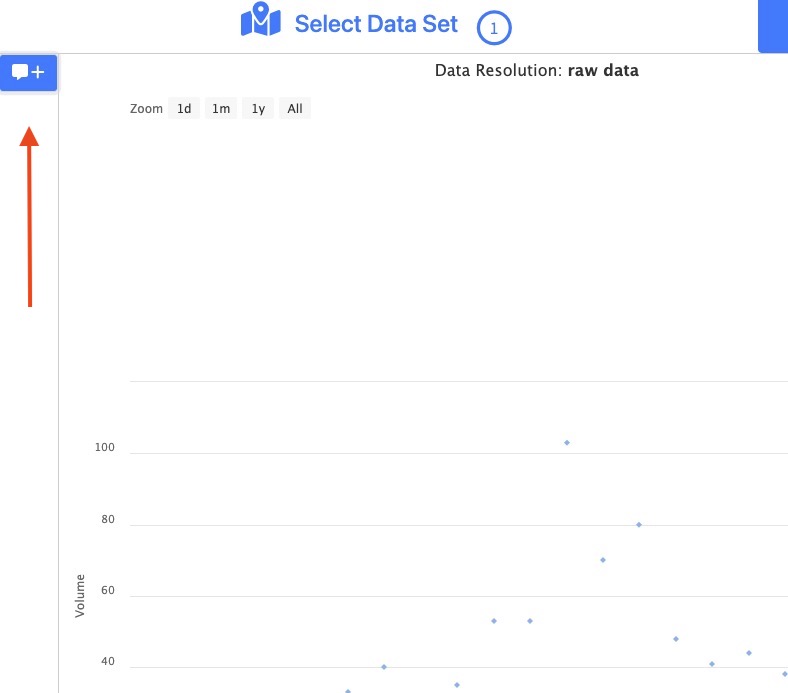
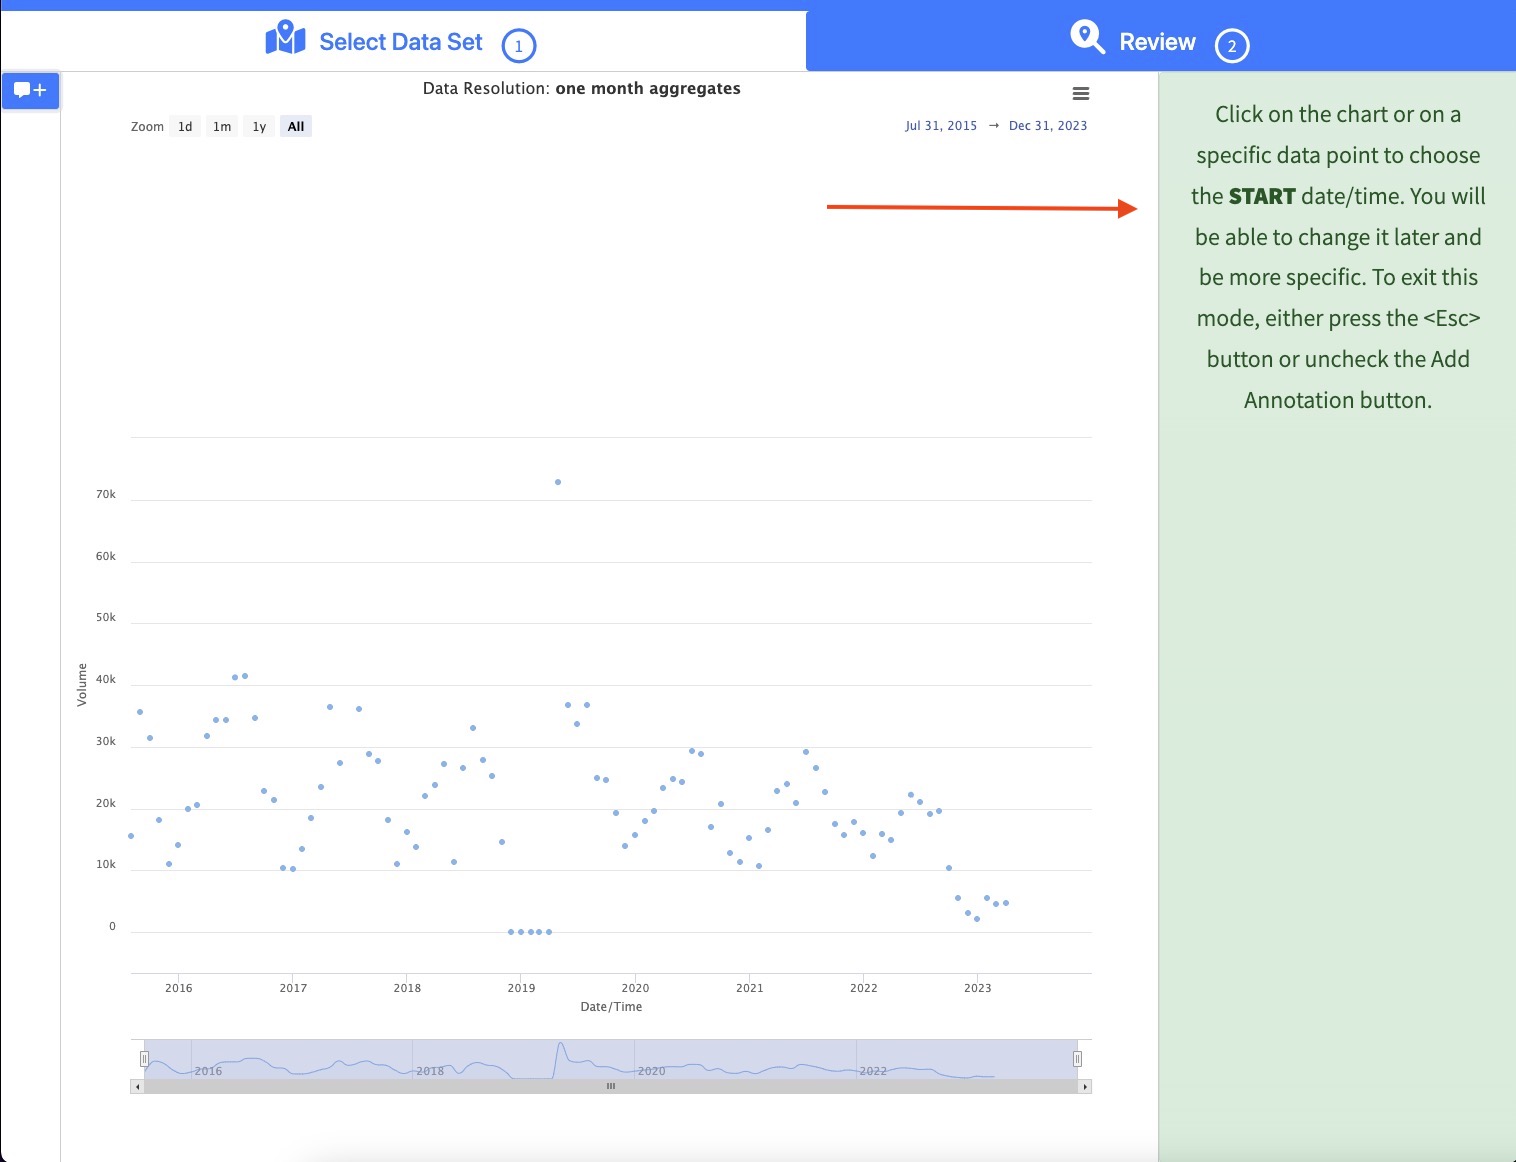
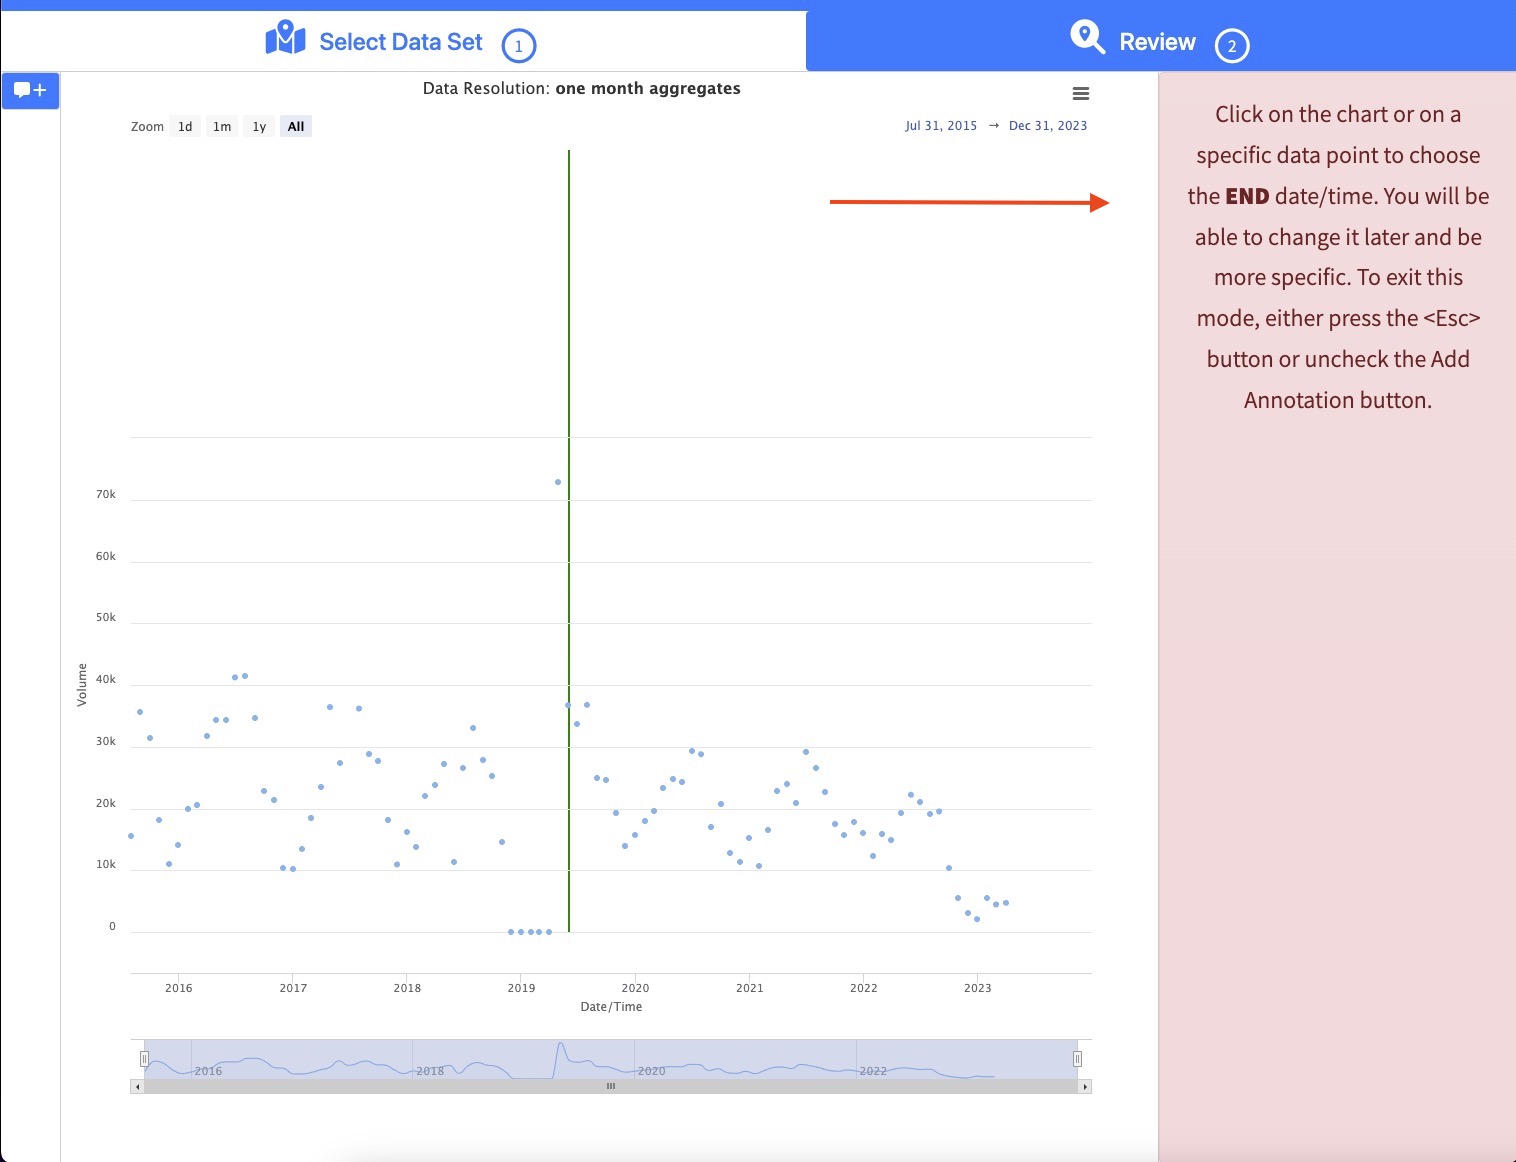
Then follow the instructions in the right sidebar:
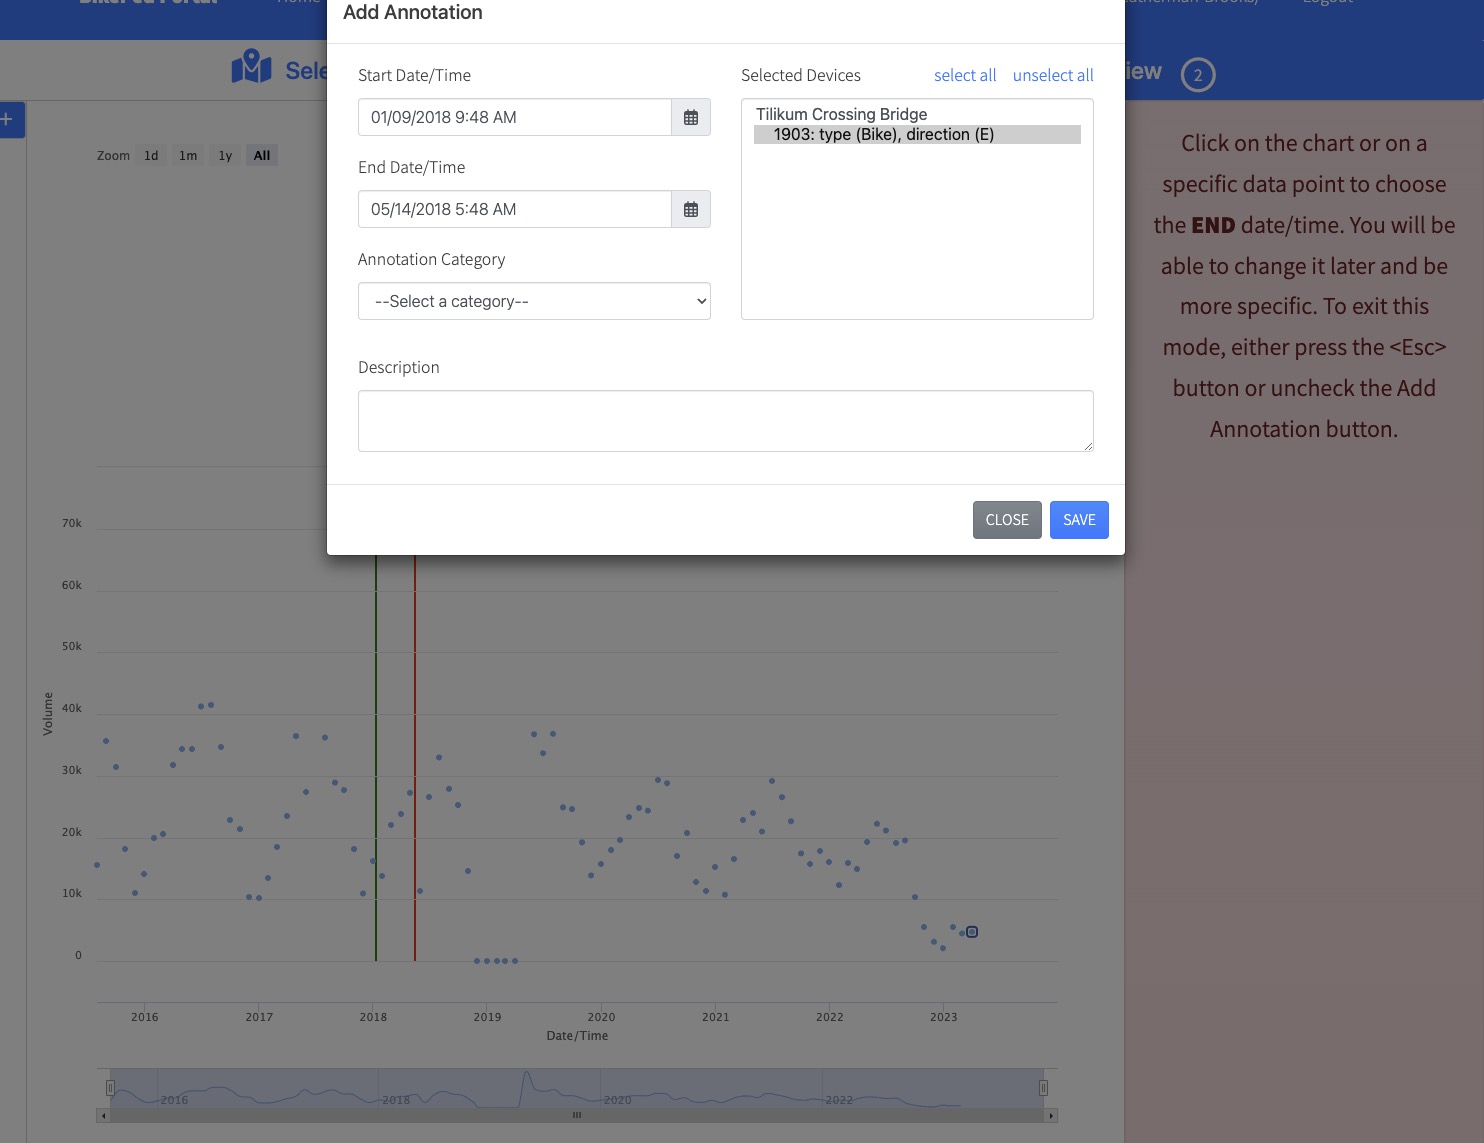
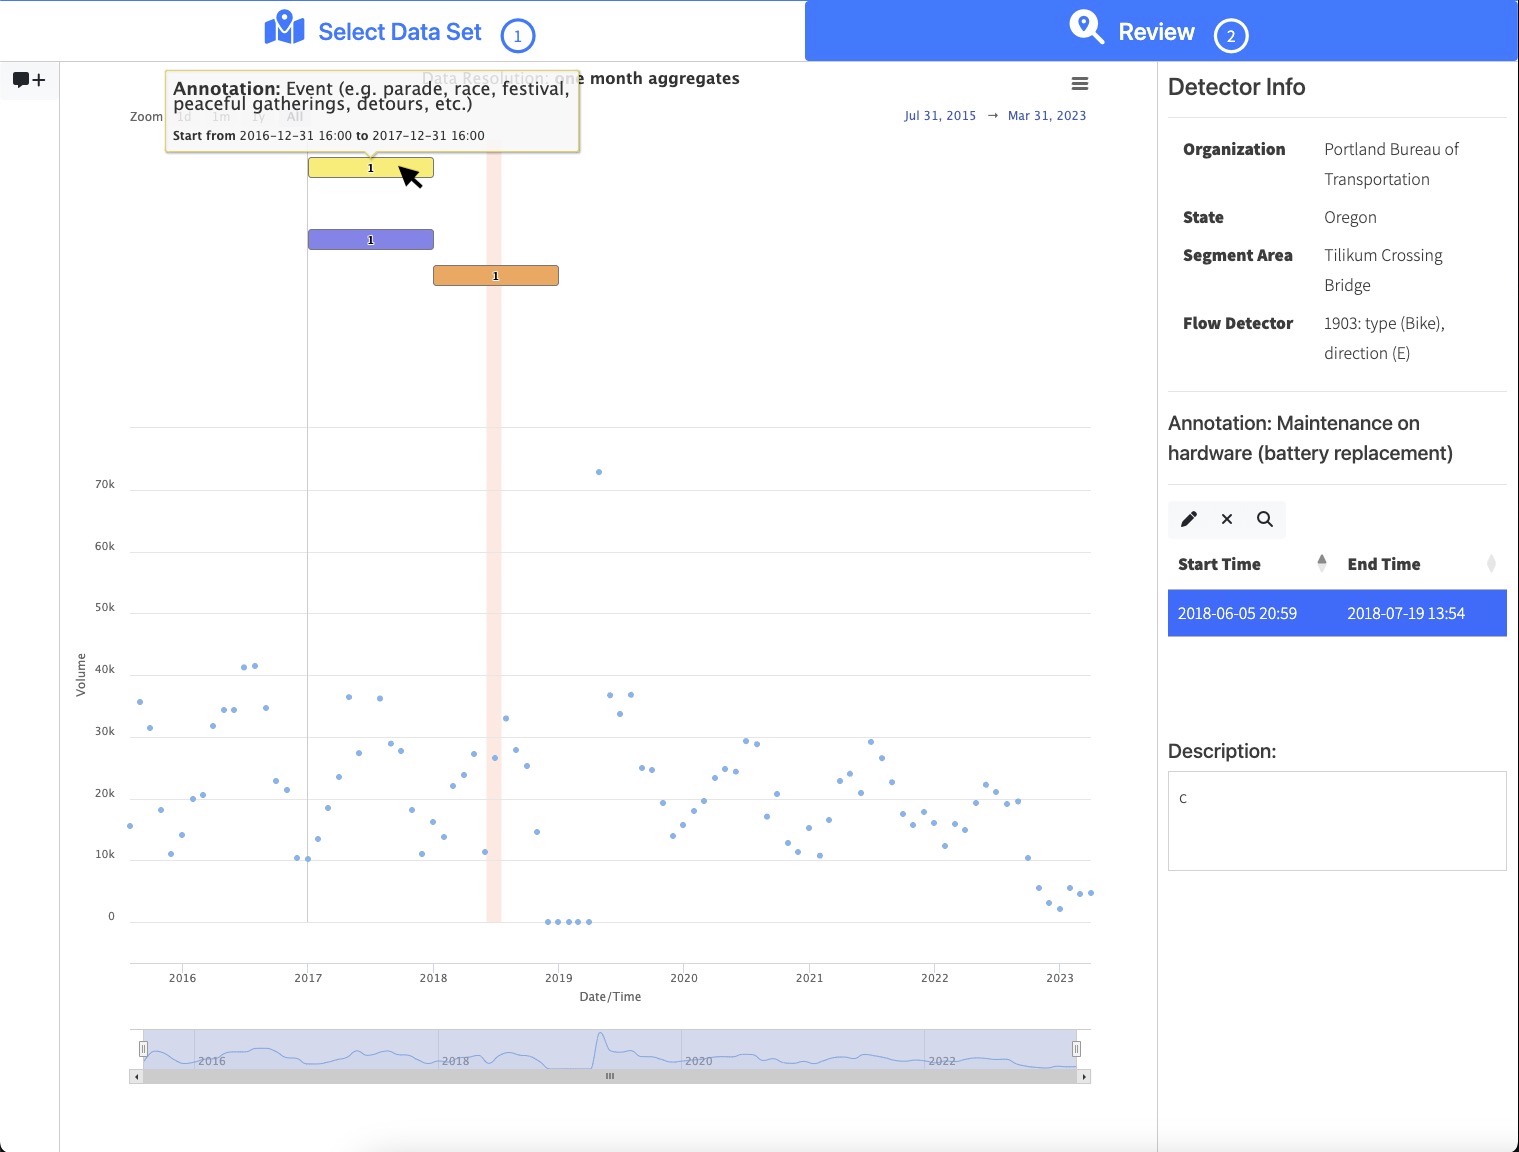
In the window, you can enter more detailed information. The current annotation categories are:
- Construction near or at site
- Data Correction (see Correction Factor)
- Event (e.g. parade, race, festival, etc.)
- Maintenance on hardware (battery replacement)
- Maintence on hardware (other)
- Malfunction
- Outside forces affection device (e.g. insects, animals, vegetation interference)
- Severe weather
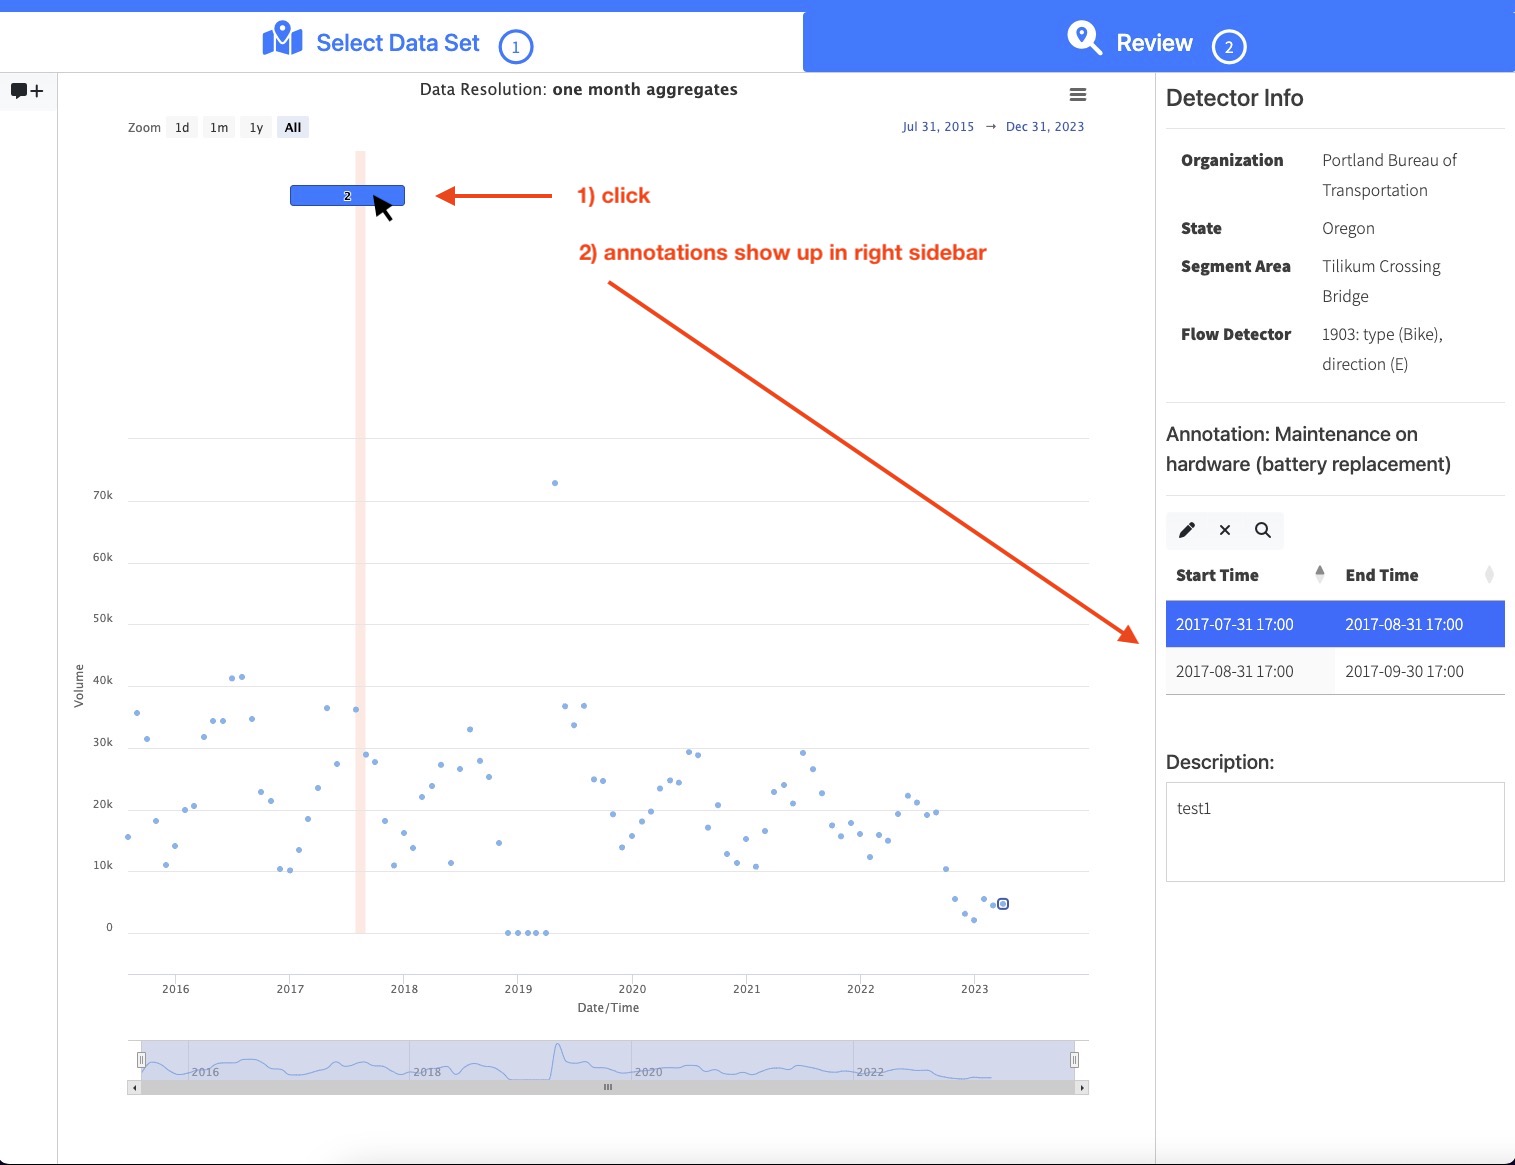
Your annotation will now show up in the right sidebar.
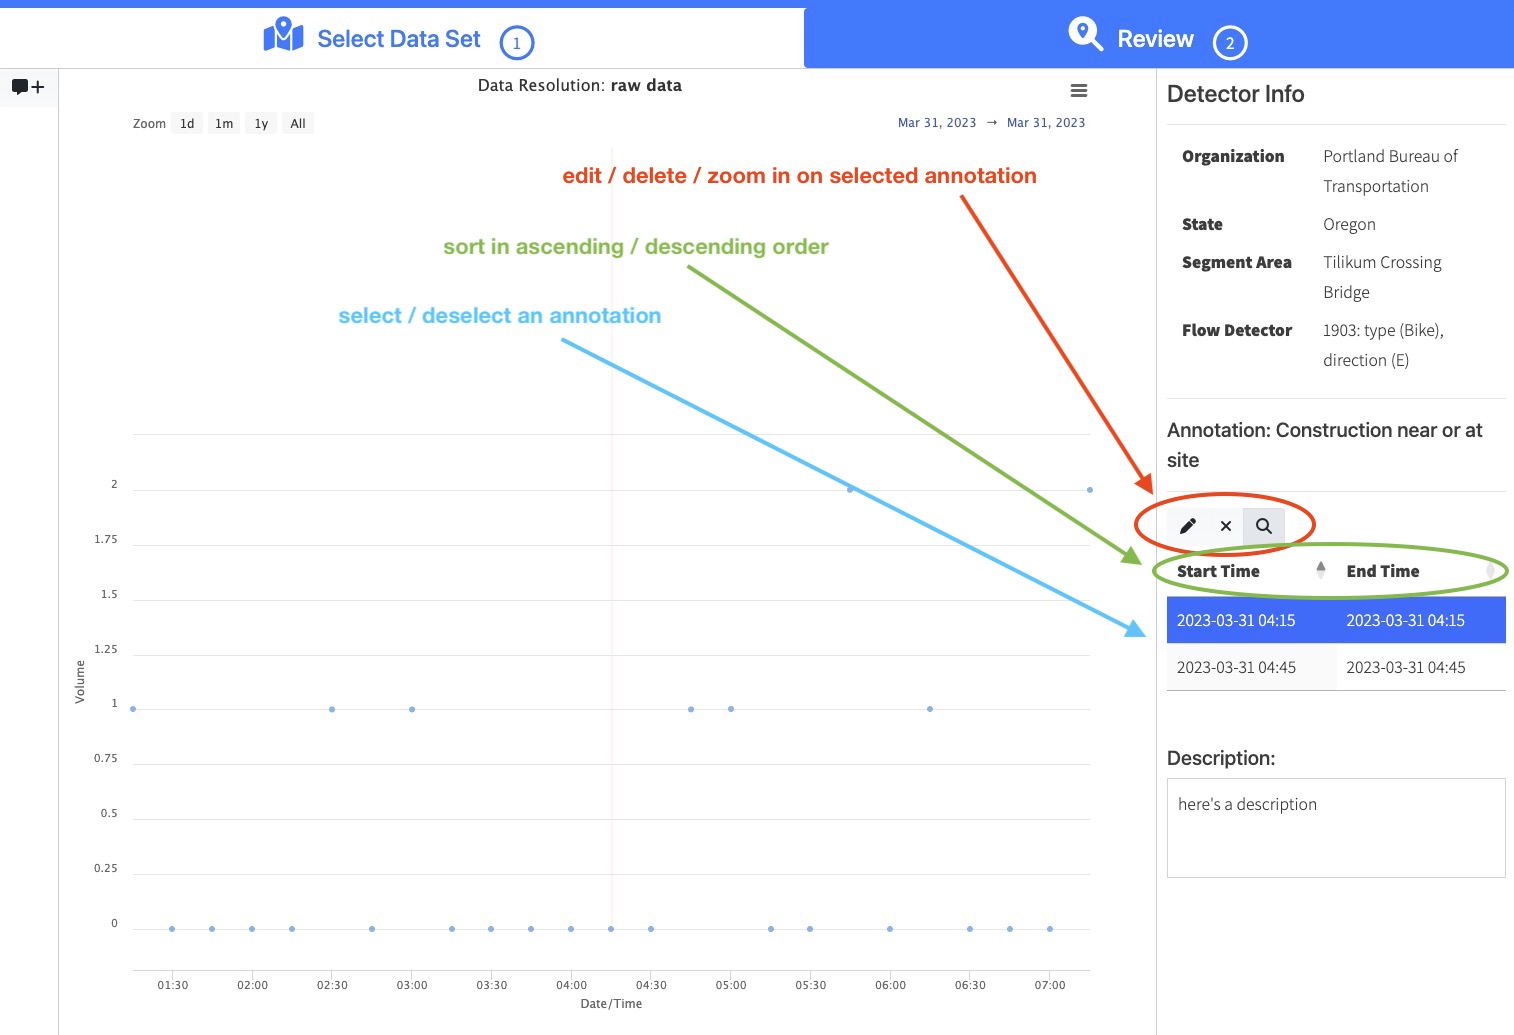
Viewing Multiple Annotations
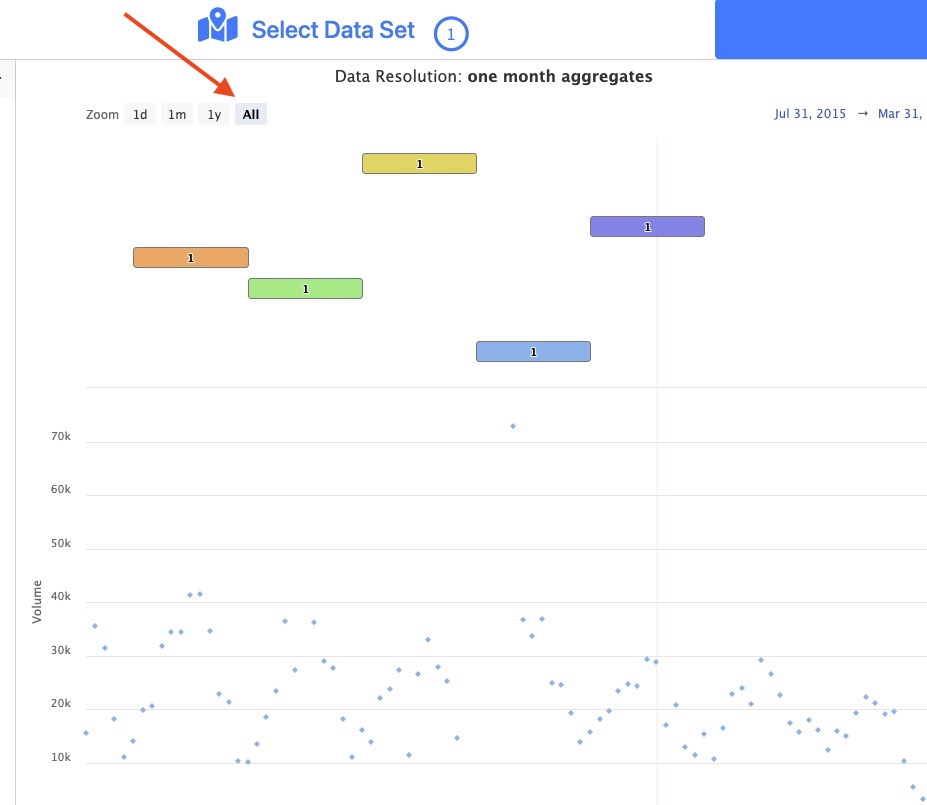
Each color refers to a different category of annotation, providing a quick visual shorthand to assess which types of anomaly were the most prevalent during particular periods of time.
Entering Bulk Annotations
You may want to enter an annotation for an event that applies to multiple detectors. For this, you will use Bulk Mode. Bulk Mode can be accessed by following the steps above in Accessing the Annotation Tool until you reach the step Select segment area of interest.
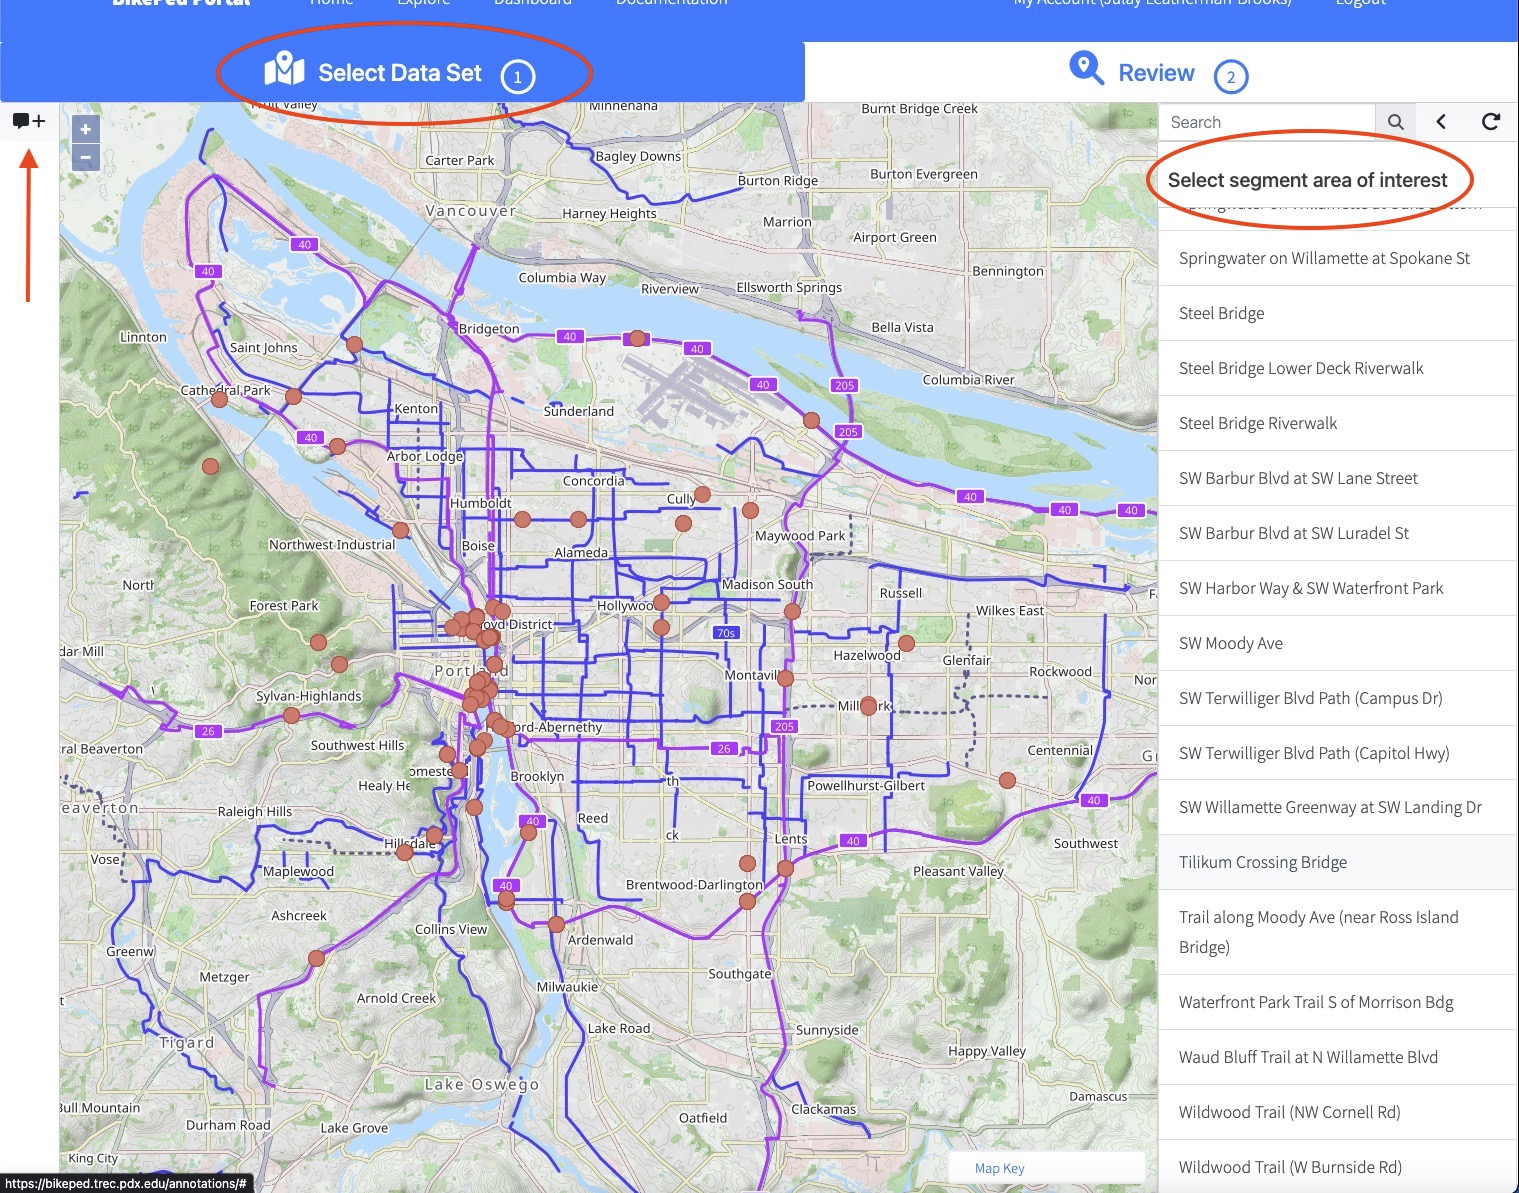
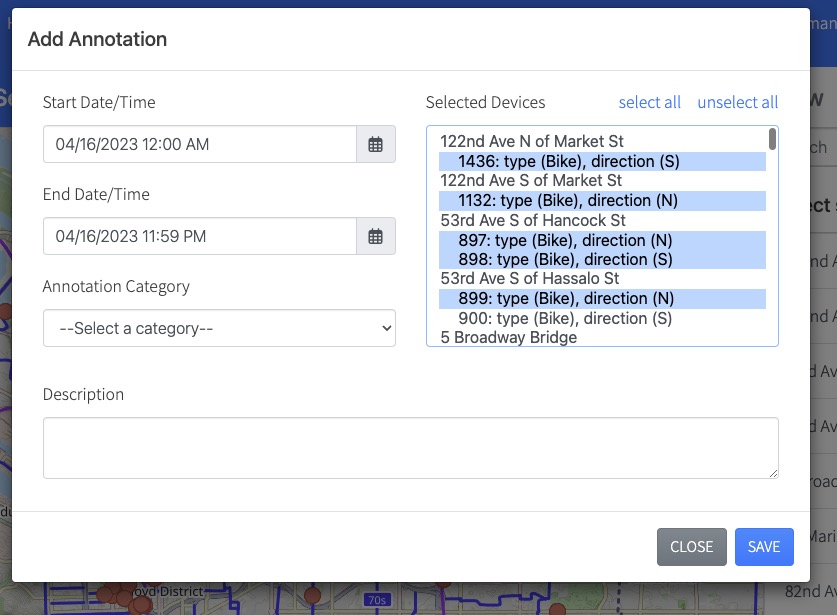
Note that the default bulk mode date/time setting will be the day you make the annotation, from 12:00 AM to 11:59 PM.